Friday, 6 July 2012

What a slacker!

Oh my - I have been rather distracted, clearly!! I have been regularly thinking 'I really *must* write another blog post' but unfortunately thinking about it has been as far as it has gotten!

This Handy Mummy has been getting to grips with single-parenting and, sadly won't be back to the night classes next term - but really, by the end of the term, I wasn't even sure what I should make as I didn't really need anything else made for the house. What I really need to do is do handy things IN the house - soon I need to go and get more wood and a sheet of ply to build the window seat into my bedroom! Plans are underway, I just need time and inclination!

Most recently I have been slowly stripping the hideous wallpaper from my bathroom walls - my heart isn't in it at the moment though, so I have been doing a little therapeutic 'riiip' here and there when I am brushing my teeth etc.

I have also discovered an unlikely new love... I started going to the gym in April and have managed to lose in excess of 11kg so far! I barely recognise myself! I am off to a family function tomorrow night, I'm quite seriously thinking about wearing a name tag 'Hi, I'm Rachel. Remember me? You might not have seen me since I was almost 24kg heavier'

I won't be able to remember details of my classes now, so I'll put up a brief description of the pictures I took, hopefully in the right order! I was up to class 3/8 when I last posted WAY back in May!


This was week 4:
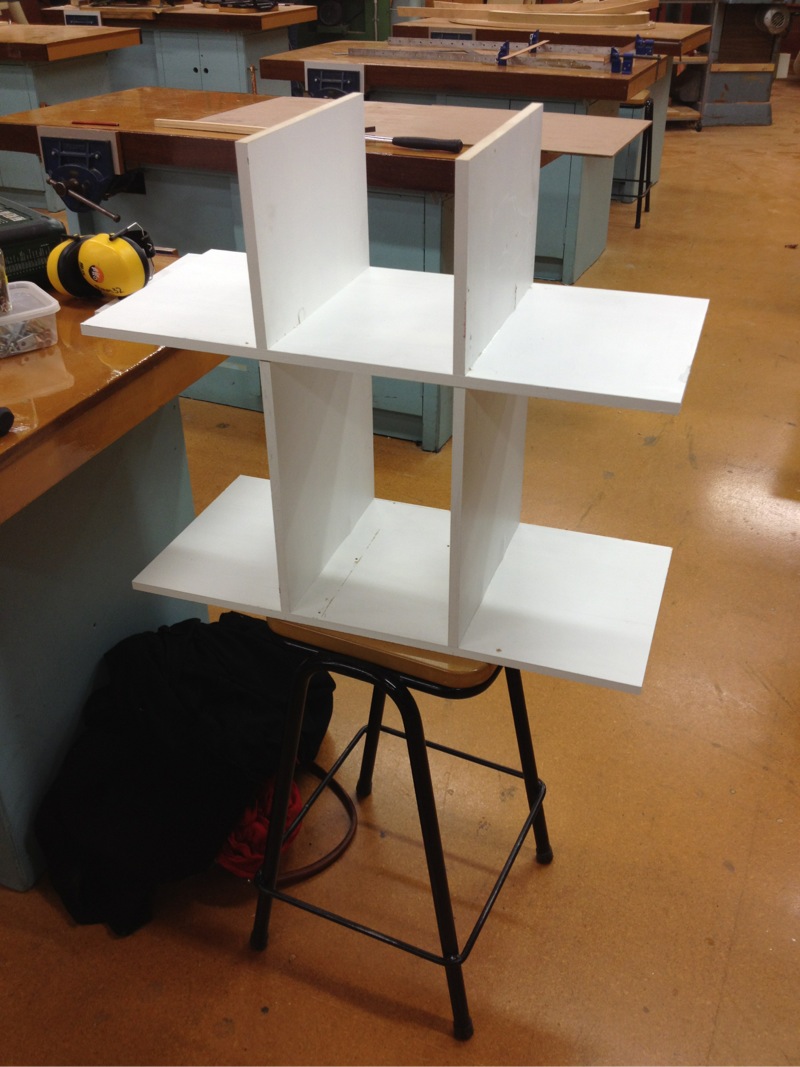
This MDF in a former life was shop fittings from Little Chalmers. All cut and ready for assembly!

Oooh the beginnings of assembly - what could it be?

If you look closely, these are just stacked up, not connected yet - that comes next week!


Week 5:

After some frustration, having made a slight (less than 2cm!) error in my measurements I had to dash home mid-class to get the last 2.4m MDF from my hall way to do the sides!

It is now living behind my front door, full of shoes! The bottom ayer of cubby-holes is almost twice as tall as the others to accommodate boots. 

Week 6:

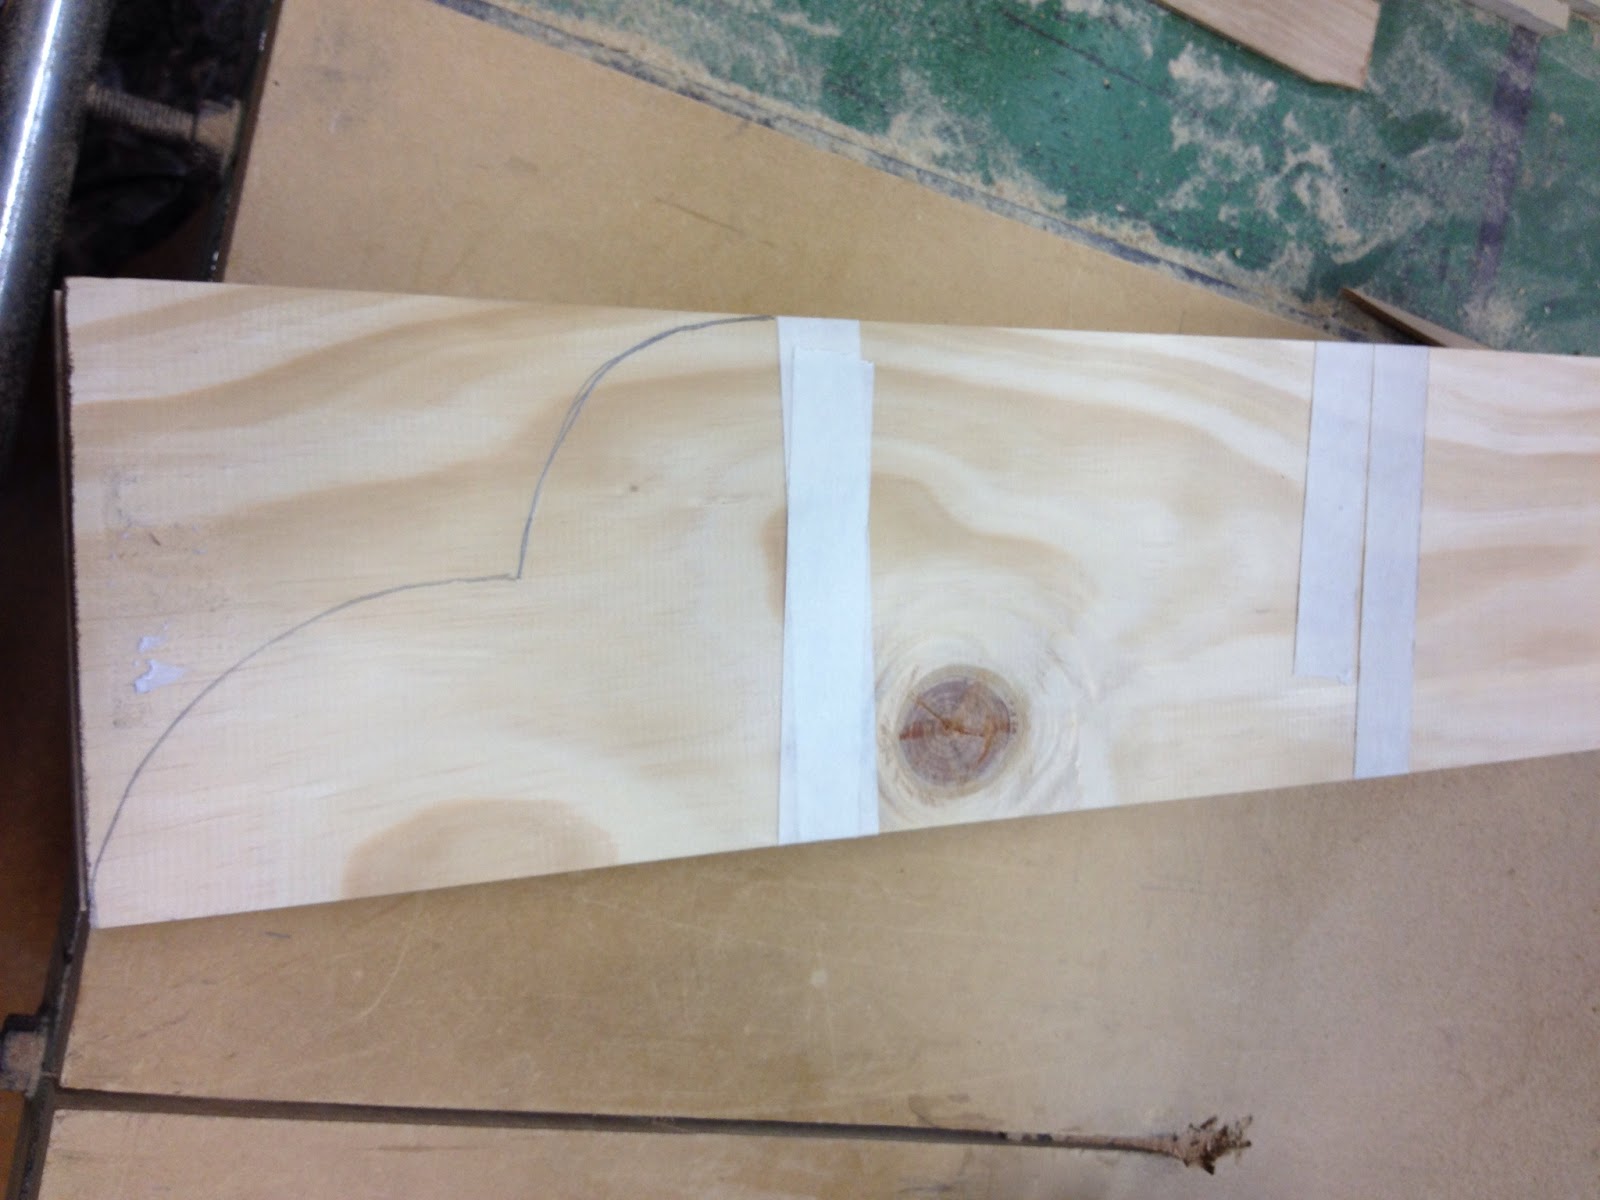
Marked out the design to cut with the bandsaw


All cut, now all ready for filing and sandpapering to within an inch of its life!

It is ill-advisable to accidentally file ones knuckle with such a beastly sharp file! 
Preferable to only file the wood!!

'Safety first' says Handy Mummy ;)

Mmmmm sawdust!


It looks like thats as far as my photos got! I must not have been thinking about taking photos the last two weeks! The last project is a shelf for my bathroom, once the wallpaper stripping has finished and the gib stopping and painting is done.

Until next time! Hopefully I won't be so long between posts next time!


Wednesday, 16 May 2012

Carpentry Class: Term 2, Week 3

I left my run a bit late this week. Admittedly I have had many many other things on my mind, and pulling apart another pallet hasn't been high on my list of priorities.

So after realising early this afternoon that it was indeed Wednesday - how it got to this late in the week already is beyond me, quite frankly - I started wondering out loud about exactly what I could make tonight.

I trawled through the plan catalogue on Ana-White.com and decided on this 'Vintage Step Stool' - something for the kids to use to help with baking and cooking in the kitchen. Heres hoping it's not used more for reaching the biscuits from the top shelf instead!

So, after a quick visit to Mitre 10 Mega, I had some dressed pine and a large tub of 50mm screws. I decided I'd just use the last piece of ply I had sitting behind the door in the hall way for the sides.

Vintage Step Stool

All the cuts done

Safety first people - ear muffs and protective glasses before we have fun with the bandsaw ;)

I managed to lose my pencil (ok - I lost it last week, and forgot to find another one) so it had to be pen to mark out where to cut. 2 pieces of ply stuck together to cut the identically.

Oooooh! Bandsaw!

10 minutes later - all cut out. Apparently I'm a 'wildcat' - quote from Robert there haha

Oops - I forgot you're not supposed to file your knuckles - just the wood!

Two sides all ready - filed and sanded.

The two bottom supports attached

The two top supports attached as well.

I really could have kicked myself! I picked up the wrong width of pine for the tops of the steps! So I needed to improvise. I used ply instead. It looks OK, but I'm not as happy with it as I hoped I would be. Never mind - kids won't care!

All done - side view!


I need to figure out what I'm going to make next week. This took only an hour and a half - and had I not needed to wait for the table saw to make the cuts for the tops of the steps after realising I had the wrong size, it would have been about 15 minutes less! Super-easy project, but will be very handy in my kitchen!

Monday, 14 May 2012

Long time, no blog

Back, by popular demand (or something similar haha)!

It has been a while since I last blogged, and to be fair, it feels like a long time since I did much worthy of blogging about.

I am almost at week 3 of the 'Intermediate/Advanced' Carpentry course at LPHS - I'll tell you about what I made in week one and two shortly.

I'm thinking back right now, trying to remember just exactly WHAT I have done in a little over a month that has been handy. In the last three weeks, I have discovered a new love - the gym! Those of you know know me well, will know that the gym and I have never been good friends, but I have been going 4 times a week, and have lost 6.2kg in that time! That is very exciting, I'm down to a size 16, probably for the first time since I *was* 16!

Red turned 2 on Easter Monday, and she has started kindy, the big kids are back at school now after the two week school holiday that followed on after Easter. And the biggest news of all, The DIY-Impaired husband is moving out next Monday, after a long time of us not being terribly happy together. We remain friends, and he will be living close by, but for the foreseeable future, it will be the kids and I. Good thing I'm no weak woman ;) And yes - I'm totally fine about this! I don't need any sympathy :)


Week 1 and 2 of Intermediate/Advanced Carpentry Class


Carrying on from my last carpentry class post, when I had pulled apart that pallet, taken it to class and dressed the timber, I used it in the first class of term to start making a headboard for my Red. It took 2 weeks classes to complete (4 hours all up) and again, was a learning experience, but I'm pretty pleased with how it came out! There are things I would probably do differently next time - and there WILL be a next time, because I need one for my big girls bed as well!


Week 1


Nailing the frame together


Uh-oh, a wonky nail!


The two bottom boards are on, and I decided to put a wee shelf on the headboard too, for keeping a drink, books, little treasures etc on. 
This pic is the shelf in position, clamped on, waiting to be screwed on.


And another angle!


All screwed on - this did make it much less easy to attach the other boards of course! 
Improvisation in the form of clamping the frame to the work bench was used after this park was done.


The finished headboard, before legs and finishing were done.


And another angle!


Week Two


Legs going on!


Somewhere between drawing up my plan originally and the first week of term 2, it went walk abouts (possibly something to do with having 3 children?) So I needed to draw something else up quickly before T2,W2 so I knew finished measurements, and placement of screw holes to attach the headboard to the bed. This was my rough plan I drew up before class, when I was scrabbling about behind the bed measuring spaces for screw holes! THEN I found I misplaced my pencil! 


The finished product! I need to stain or varnish it now - so it still isn't attached to the bed, but I want to protect it from Miss Red and her drawing skills first ;)


So there we have it! I am quite pleased with it really, though, I know there are a few things I would do differently for the next one.

Week 3 is this Wednesday, so I really do need to get out there and pull another pallet apart, as I'm in need of another 3 slats!

Saturday, 7 April 2012

Easter Weekend

Yesterday was Good Friday. So in true DIY spirit, I spent the 'day off' - ok - the morning really - cutting the hedge.

We have a tall, probably 2, maybe 2 and a bit metre high hedge running down the entire length of one side of our property, and a shorter, I would say 1.3m high hedge running the length from the front of the property to the end of the house on the other side.  We have fantastic neighbours who keep their sides, and the tops nicely trimmed. We on the other hand, are useless at trimming our sides and the result is usually plain to see!

You see, I generally leave it to DIY-impaired husband to do - I don't see it as DIY. I see it as general upkeep, which is his department, like weeding etc. But having gotten sick of it not being done over the Christmas break when he was off for four weeks, and wanting to move my shed this weekend, I decided there was only one thing for it. Doing it myself.

One of my grizzling 'helpers' helping clear up the aftermarth

It was the first time I'd cut the hedges at this house. It wasn't a very long or arduous job though, took an hour or so, with a break for putting Red to bed with a milky in between. The clean up still remains however. I made the mistake of enlisting the two big kids to help. One prefered to hunt for crickets in the aftermath of the hedge trimming, the other kept telling me he needed a rest every two seconds. I eventually threw my hands in the air and told them to go inside and have some lunch because I was sick to death of hearing them grizzle! *Note to self: Purchase leaf rake - our neighbour from our last house still has ours!

More of a 'before' pic looking down towards the front of the section.


Today (Saturday) on the DIY front, I got my Mum to come over. We emptied out the shed and got the DIY-impaired husband to give us a hand with some muscle, he stood inside it, lifted at the beam inside and we guided it onto the platform from opposite corners.

The shed resting on it's new foundation with DIY-impaired husband inside, 
doing what exactly, I'm not sure!

I screwed it securely to the pallet platform/floor - wahey! We wriggled and jiggled it around a bit until some of the side panels that had come away were back where they were supposed to be in the channels at the top and bottom, and then with Mum inside the shed and me outside, she held the small piece of wood I gave her, against the metal as a chock, while I screwed it together from the outside. I went around and fixed anything else back into place that had come adrift.

The flashing in place!

Then it was time to fix the flashings on the roof. I love that my new Gorilla ladder is so versatile, I felt quite safe up it with the legs at different heights! I did one side to the middle, then had to clear away some of the hedge cuttings, and use the loppers on some of the hedge to cut of bits that were protruding  so I could get the ladder in the other side. I then fixed the flashing back on at that side to the middle! When I had put the shed together initially, I didn't fix the flashing on properly because a) I was much larger than I am today and was scared I was going to break something (like the shed or the ladder!) and b) my ladder was already rickety and I was aware that my father had fallen off of it once and it was a bit wonky.

Ramsay the ginger hard at work 'helping' by sleeping in the grass catcher!

Around that time, I sent the DIY-impaired husband off on a carpet collection run. I had managed to get a free square of carpet from Freecycle, this was to be used on the floor, not to make it pretty, but to make it more functional - I didn't want things falling through the floor! Once he arrived home, Red had decided it was time for a sleep, so I headed inside and left Mum and the two big kids to put the carpet down in the shed, and as it turns out, they also loaded everything else back in too!


The shed with it's back back on, manky carpet down, and most things moved back in.

After Mum left, when I had gotten Red to sleep, I did a bit of a tidy up in there, but it still isn't quite the way I want it. I will need to build the window seat for my room first, so I can empty out the cupboard I want to put in there.

Door attached - viola! We have a fully functioning shed again!

While cutting the hedge yesterday, I also rediscovered the old workbench top that was in the shed we demolished almost as soon as we moved in. It is a bit long for the shed, but I will probably build a frame for it and cut the ends off so it can become a useful workbench again.

Now that the sun has come out, plans for the afternoon include cutting the rest of the grass and enjoying the sun with the kids.

Happy Easter everyone!

Thursday, 5 April 2012

Thursday Busy-ness

Yesterday turned out to be a grey and uninspiring day for outside DIY, so Red and I spent most of the day doing inside things.

Today, however, we were back to the absolutely stunning weather that we have been experiencing the rest of the week. This made me very happy!!

We had a lot to do in town this morning and got home around 12. Red managed to stay awake through the journey home, distracted by the roadworks along the way, then several loud renditions of 'Twinkle, twinkle little star'. After a quick change and a milky, she was off to sleep. I did a mad dash to the supermarket, inhaled a bit of lunch then headed outside.

My first task was to pack some soil around the new washing line socket. That took all of three minutes. But the washing line was full of about, oh, 5 loads of washing, so I had to wait until around 4pm to move the washing line.


There we have it! Clothesline in it's new position, and still, not a cloud in the sky!
Kids in the distance shoveling the mud from the hole into a bucket!


Then it was on to my next task - the one I have been wanting to do for a long time, but haven't had the time, or, lets face it, the inclination.

I grabbed the wheelbarrow, and brought the pallets around to the south side of the house one by one. I put down some black plastic (the kind you put under your house to help with insulation) and arranged four pallets as best I could, packing underneath as necessary with off-cuts of wood.


Pallets arranged together - shame they're not exactly uniform sizes!


Then it was on to nailing them all together.


These are nail plates - the one on the left is the side you whack with the hammer, the one on the right is the side that goes onto the wood.

So I bashed the hell out of 12 of these, sorry to anyone who heard me making an unholy racket this afternoon! I was sure I would wake Red up! But no! Amazing!


The finished product!

Red actually slept for three hours!! So I had to get the big kids to walk home from school. I even managed to get some of the old climbing rose cut up and into the wheelie bin (the rose who climbed too far, fell down, and subsequently got dug out because we need to re-clad the house, which may happen sometime in the next 10 years, if we're lucky!)

I have plans to get my Mum to come over on Saturday morning to give me a hand to move the shed to its new home on the pallet platform. Tomorrow morning I'm off to collect a square of ugly green carpet to put down inside the shed to stop things falling through the holes between the slats. Go freecycle!

Tuesday, 3 April 2012

Carpentry Classes 7 and 8 and the rest.

Oh dear - not so good on the updating of the blog last week, I shall chastise myself later! ;)

Carpentry Class: Week 7

Last week I completed the window seat for the girls room. I remembered to take my own drill, which saved a lot of headaches and got me finished in good time indeed!

The 'lip' attached around the top

I cut and attached the back, which is part of the chalkboard from my old shop, and cut and attached the 'lip' around the top of the seat to stop the cushion from shooting off and becoming either a missile or something worse (if you have children old enough, you will understand!)

Completed window seat, ready for painting and a cushion.

I need to paint it, as it is still sitting on it's end in my bedroom, not being terribly useful for much aside from keeping my drill on. Though the kids have started using it as a shelf!


Other bits around the house

With an off-cut from the chalkboard back on the window seat, I screwed it to the wall in the kitchen - it is now out menu board! I have written Sunday-Saturday on there and under each I write what we're having for tea that evening. I'm not terribly good at getting things out for dinner in advance - the menu board hasn't changed that!


Menu chalkboard in the kitchen - excuse my hideous turquoise walls! (A real treat paired with the 'when cats paint' wallpaper in the dining area, I'll tell you!)


Outside Bits

For a while now, the kids second trampoline (the first having been pitched about in the wind, the net destroyed and a hole put in the mat in some very strong wind just before Christmas 2010 - I do wish we had just had that mat either patched or a new mat purchased, in hindsight - it was a fantastic, sturdy beast!) which was a cheapie, has been twisted and is 'out of order' so they haven't been allowed to jump on it.


Poor wonky trampoline.

I don't know why I didn't think of it earlier, but it suddenly came to me the other day - why don't I take it apart, straighten it up, and drill holes through it and put in bolts to keep it straight? This morning we went to Mitre 10 Mega for a few things, and amongst our purchases was a packet of bolts. Perfect! If only my drill had been charged enough, I might have gotten more than two holes and bolts done. Never mind - tomorrow is another day!


Bolted through!


On Monday, on a whim really, I decided that I needed to move our washing line for winter. It was a good idea really, with winter approaching, the house casts a great big shadow over my washing line where it is, and, strangely enough, the washing doesn't dry. Another Mitre 10 purchase today was a Hills Rotary Hoist Clothesline replacement socket set and 2 bags of quick set cement. I only needed one as it turns out - so I shall take the other back.

After I had Red in bed this afternoon, I took a little break for lunch - bacon butties in the back yard, surveying all that I am Queen of, and contemplating all of those jobs that need doing! DIY-impaired husband was off at the movies on his day off, so was as much help as ever. After I had lunched, I dug a 650mm deep hole and sited the socket in the ground, mostly as per the instructions.


Ready to cement 'er in!

I got the water and the cement and put them in the hole, after making sure the socket was level (again, *mostly* as per instructions... One should perhaps read things properly next time - but alls well that ends well, right? It was supposed to be water first, then cement mix... not the other way around - oops!) I have left it to cure and tomorrow after lunch I'll whisk the washing line off to it's new winter home, 4m (maybe less?) away ;)


Waiting for the cement to set.


Final Carpentry Class for Term One

Last Thursday, I had a call from my mother saying that Frank, the bloke who sources things etc at her work, had managed to get me 7 pallets! My plan with these pallets was (is) to use them as a platform to anchor my shed to. None of them are the same size as each other, and they are slightly larger than I expected, so I decided to break one down and use it as timber.


Pallet before.


Pallet after!


My plan is to make the girls headboards for their new King Single sized beds. They will incorporate mostly the recycled wood from the pallet and some new wood which I purchased from Mitre 10 this morning with the help of Red.


Clears on the right, bottom of the pallet on the left, after being cut to 50mm wide

This evening at carpentry I got to dress them! I cut the wider bits dow to the right size then I got to run the rest through the thicknesser. Fantastic machine! They go in looking like manky old bits of wood, they come out smooth and shiny! Both sides were thicknessed, then the edges were buzzed with the buzzer - like an upside down electric plane on a table really!

Quite amazing - the wood was totally unrecognisable after it had undergone it's transformation!!


Bottom of the pile, the dressed timber, the one of the top is what it used to look like!

I measured and cut the pieces for the frame to which the old pallet will be nailed. I then mitred the corners (I used the mitre square to mark them - before Robert showed me that I could actually just set the saw to 45 degrees and cut like that! Easy as!)


Mitred corners - looks like it could be a frame soon! And there is my chicken scratching of a plan in the middle.


Then it was time to pack up and go home. I really didn't think I'd get to cutting up the dressed pine clears that I bought this morning. I thought that I'd probably spend all of the two hours dressing the timber, so that was nice! I had planned to just dress the timber and figure out the rest at home. I still need to figure the rest out, but I don't need to figure out mitring the corners now - bonus!